support@webharvy.com | sales@webharvy.com | YouTube Channel | KB Articles
How to use Luminati Proxy Network with WebHarvy ?
- 1. Sign up for a Luminati proxy server network account.
- 2. Sign in to your account dashboard.
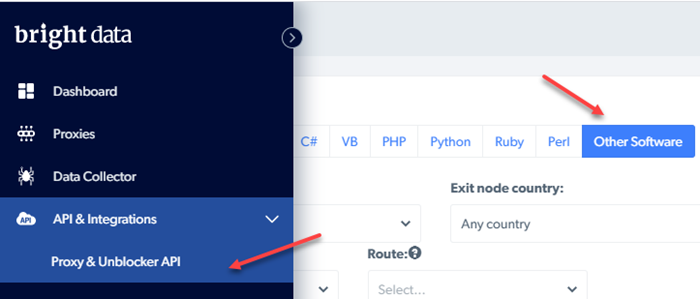
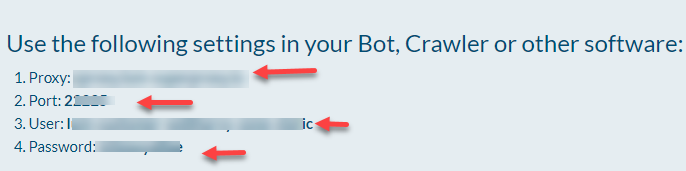
- 3. Select 'With a crawler or a bot' option under 'Integrate with Luminati Proxy Network' and click the Next button.
- 4. In the resulting page, you should be able to view your proxy server address, port, user name and password
- 3. These details should be provided in Webharvy > Home menu > Settings > Proxy Settings Tab as shown below.
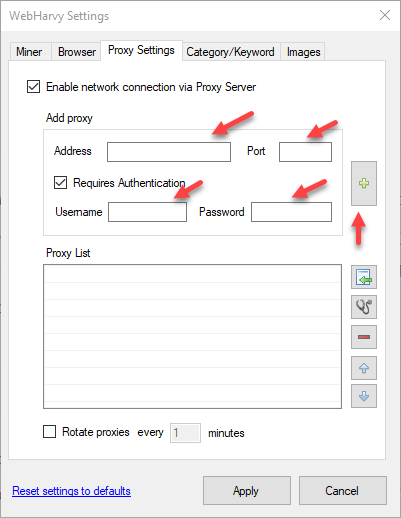
Click on the '+' button at the right after providing these details and then click on the 'Apply' button at the bottom. - Webharvy is now setup to mine data via Luminati Proxy Server Network.
Note 1 : Webharvy will use proxy servers only during mining. The configuration browser of Webharvy will not use this proxy server. So, if you check the IP address within the configuration browser it will still be the original IP of your computer. To make the configuration browser use the proxy server, you should set the proxy address directly in Windows.
Note 2 : To disable proxy server, you just need to uncheck Webharvy > Home Menu > Settings > Proxy Settings Tab > 'Enable Network connection via Proxy server' check box